Problem: Unable to Setup a NetGuardian to Be Polled by T/Mon
Platform: NetGuardian, T/Mon SLIM & NOC
Setting up T/Mon to poll a NetGuardian is a common and important part of new RTU deployments. If T/Mon can't poll your remotes, you don't have the visibility you need to do your job.
Use the following "techno knowledge" paper to setup T/Mon to poll a NetGuardian and troubleshoot common issues.
This "techno knowledge" paper can help you if:
- You are unable to setup your T/Mon to poll a NetGuardian.
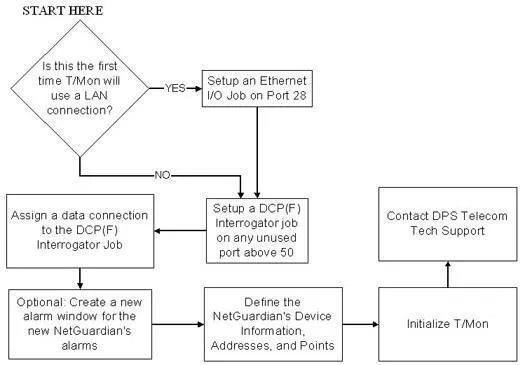
Quick Reference Chart
 For more details, see the Troubleshooting Checklist below...
 Troubleshooting Checklist
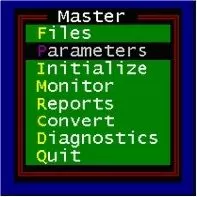
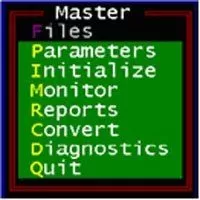
- From the Master Menu of the T/Mon select the 'Parameters' option. This will open the Parameters Menu.
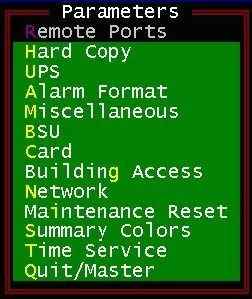
- From the Parameters Menu select 'Remote Ports'. This will put you in the Remote Parameters mode.
- NOTE: This step is only necessary if this is the first time your are setting up your T/Mon to use a LAN connection:
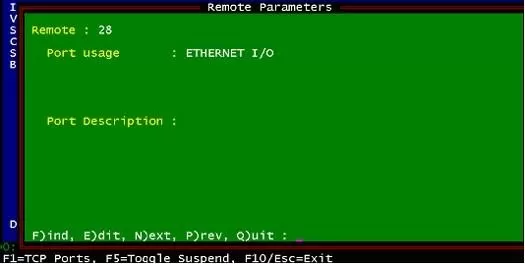
- The Remote Parameters screen will default to the last port that was being edited. To find Port 28, press the 'F' key and find a port. Enter '28' and press 'Enter' to find Port 28.
- Press 'E' to enter Edit mode. Use the 'Tab' key to select "ETHERNET I/O".
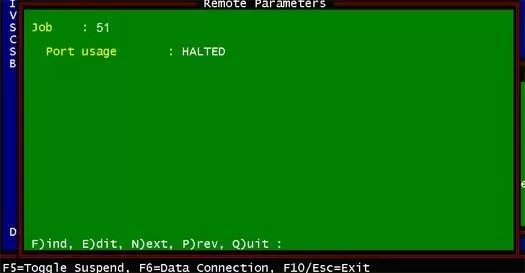
- Press 'F' to Find or press 'N' repeatedly to reach any available job port (50 or higher). An available job port will have a "Port usage" of "HALTED".
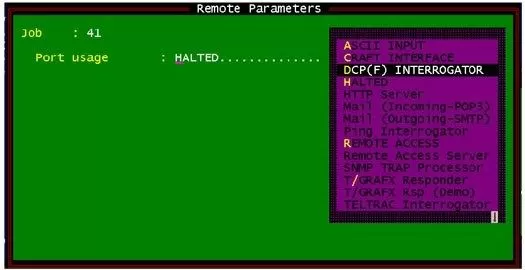
- Once you have found any available ("HALTED") job above 50, press 'E' to enter Edit Mode. Use the 'TAB' key to select the "DCP(F) INTERROGATOR" and press 'Enter'.
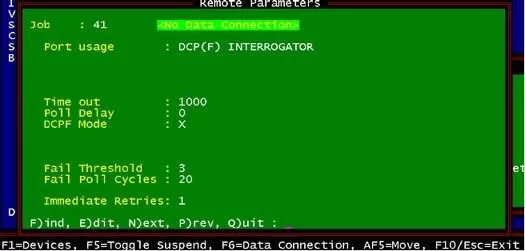
- Set each field to the value that appears in the screen capture below. NOTE: After filling in the fields, you should see a <No Data Connection> message.
- Press 'F6' to reach the Data Connection screen
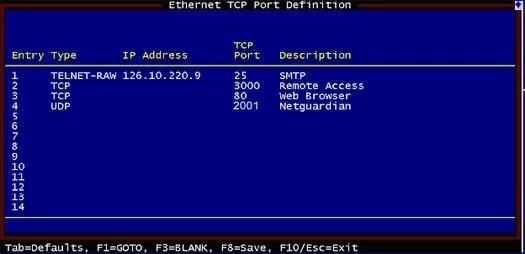
- Press 'F1' to reach the Ethernet TCP Port Definition screen.
- Use the 'TAB' key to select "UDP".
- Set the TCP port to the same port number that you chose when configuring the NetGuardian (default is 2001).
- Press 'F8' to save your changes.
- Exit back to the Master Menu
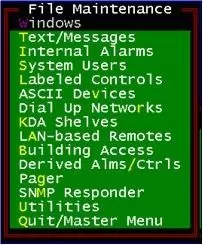
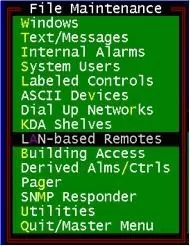
- Select 'Files' from the Master Menu to reach the Files Maintenance Menu.
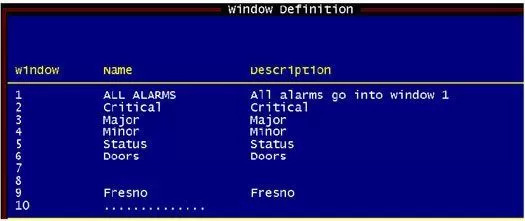
- Select 'Windows' from the menu to reach the Window Definition screen.
- From the "Window Definition" screen, you can set up an alarm window to send your NetGuardian's alarms to later in this procedure. To do so, simply move to the end of the list and enter a new name and description for your new alarm window.
- Press F8 to save any changes on the "Windows Definition" screen and return to the "File Maintenance" menu.
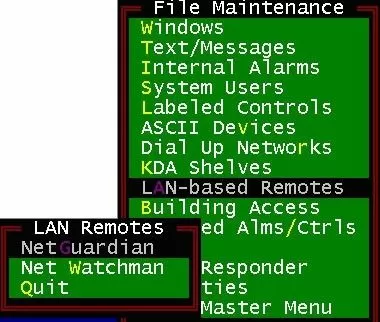
- Select "LAN-based" remotes from the "File Maintenance" menu:
- Select "NetGuardian" from the "LAN Remotes" menu:
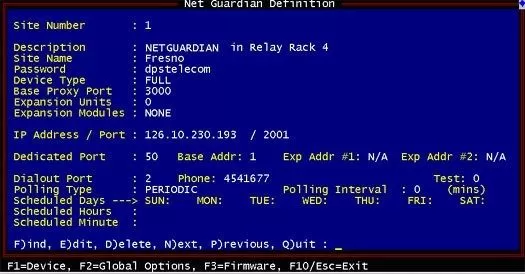
- Fill in the "NetGuardian Definition" screen appropriately for the NetGuardian you are setting up. An example is shown below. NOTE: The "Base Addr" field should match the Unit ID number on the NetGuardian.
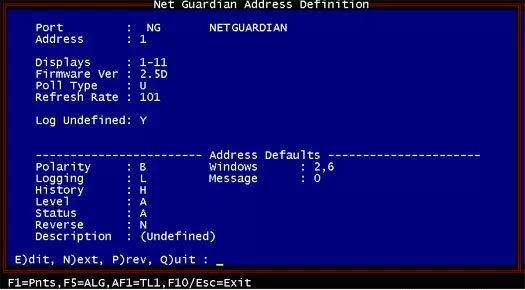
- Press F1 to reach the "NetGuardian Address Definition" screen.
- Enter the firmware version currently loaded on your NetGuardian
- Enter the Address Defaults settings (see page 7-11 in the T/MonXM User Manual for details)
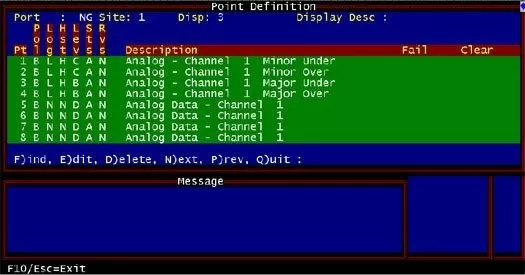
- Press F1 to reach the "Point Definition" screen. This screen will default to display 3, which is the start of the 1st analog channel for the NetGuardian.
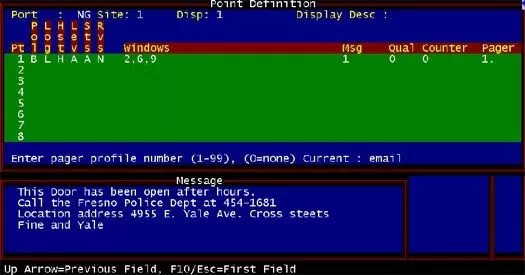
- Use the 'F' key to find Display 1 for the NetGuardian, which contains the discrete alarm inputs.
- Input data for your discrete alarm points similar to the example screens below (refer to page 7-13 of the T/MonXM User Manual for details):
- Exit to the Master Menu.
- Select "Initialize"
- Select "Monitor"
Your NetGuardian should now be correctly set up within T/Mon.
To verify that your NetGuardian is being correctly polled by T/Mon, you may wish to perform the check described below:
- From the Alarm Summary screen in Monitor Mode, press Shift+F6 to reach the Site Statistics screen
- Adjust view to NetGuardian polling leg. You should see the number of polls rising as the new NetGuardian is polled by T/Mon.
If the polls are failing, try to ping the NetGuardian's IP address.
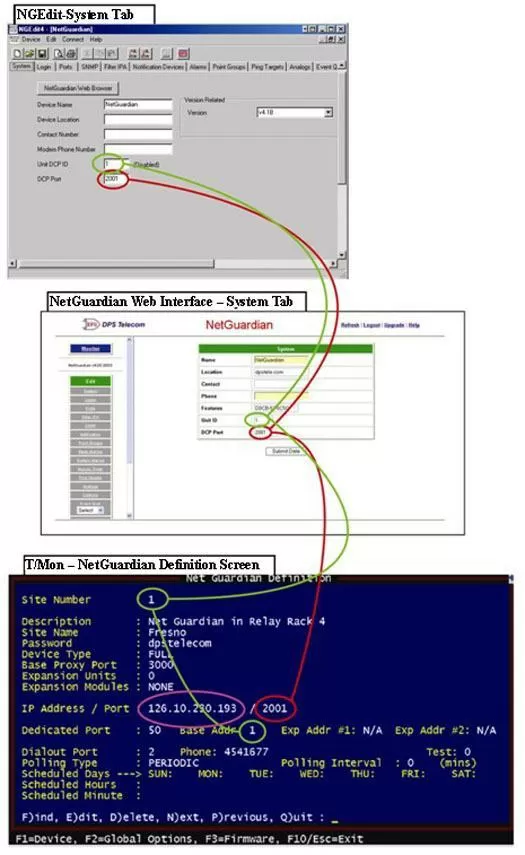
If the NetGuardian responds to pings but is not being polled correctly, check its configuration settings. The most common errors are an incorrect TCP port or Unit ID.
The following image is a reference to assist you in correctly filling in these fields.
 The UnitID, SiteID, and DCP Port fields should match. The IP address circled in pink must also match the IP address configured on the 'Ports' tab of NGEdit or the NetGuardian Web Interface.
 If you continue to have issues setting up a NetGuardian within T/Mon, please contact DPS Telecom Tech Support.
