Check out our White Paper Series!
A complete library of helpful advice and survival guides for every aspect of system monitoring and control.
1-800-693-0351
Have a specific question? Ask our team of expert engineers and get a specific answer!
Sign up for the next DPS Factory Training!
Whether you're new to our equipment or you've used it for years, DPS factory training is the best way to get more from your monitoring.
Reserve Your Seat TodayHere at DPS, our goal is to make your life easier. Equipment from DPS is designed to last for over 10 years, so you can set it up and let it do its job without interruptions. We want to make sure your network is reliable, monitored, and brings issues to your attention as soon as possible. For these reasons we provide a large number of features and configuration options on our units. With as many options as our units have, it can be difficult at times to know how exactly to configure the unit to seamlessly integrate into your network.
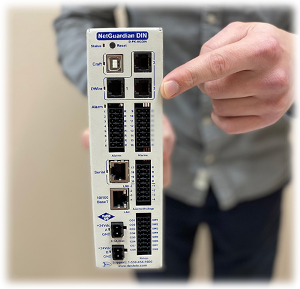
Recently, I had a tech support call where a client called in about getting his NetGuardians set up. He was hired a while back at the company, but had never worked with our equipment. They had purchased several NetGuardian 832A G5 units a few months ago, but hadn't quite put them into use yet.
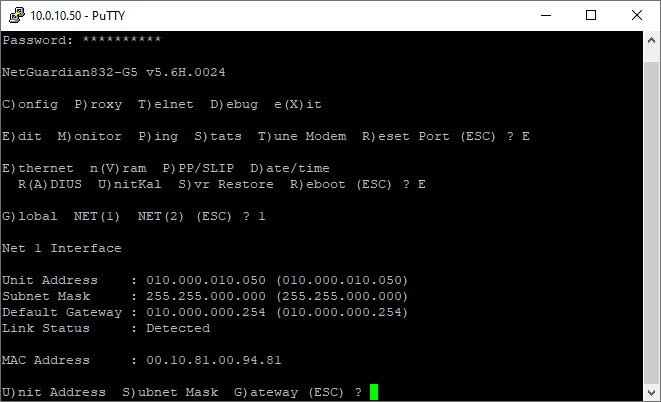
The first thing that we did was use the provided DB9 to USB cable to connect to the unit through the craft port. We used PuTTY to connect at 9600 baud on COM1. We logged into the unit using the default password of "dpstelecom". Once we got inside the unit, we configured the Ethernet settings (Config -> Edit -> Ethernet) using the IP address, subnet and gateway provided from his IT department. We also connected an Ethernet cable from his network to the NET1 and NET2 port on the back of the unit. It's important to remember that NET2 is not a backup connection, but is instead a separate way of accessing the unit. Setting NET1 and NET2 to the same IP address will cause issues.
Once his Ethernet settings were configured, we rebooted the unit to make them take effect. This allows us to navigate to the the unit through the web interface. The web interface provides us with the full range of configuration settings that aren't accessible through the craft port. After the unit came back online we navigated to the unit by entering the IP address we just assigned it into a web browser. We were greeted with the DPS Telecom login webpage for the unit.
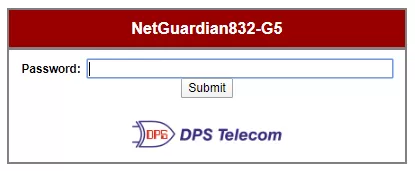
NetGuardian login prompt.
We logged in using the same credentials as before. At this point we had the unit accessible remotely, and the client began connecting his alarm points to the unit (the user manuals have a pinout for the amphenol inputs). Once he had set up a few alarms, we went into the web interface and gave them each a description by going to Edit -> Base Alarms.
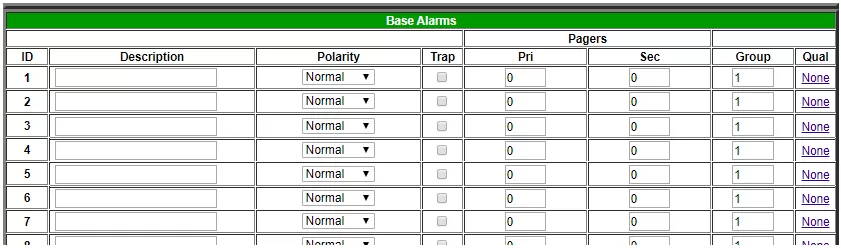
Default base alarms screen.
What we had now was a NetGuardian that had it's alarms set up, but nowhere to send notifications to, so that was our next course of action. The protocol our client used for their notifications was a master station that used SNMP, so we began setting it up. The first step was to configure the Global Trap Managers under SNMP in the Edit section of the web interface. He only had one master station, so we put the IP and chose V2C for the trap format. We left the second input field at default. This set up our notification target, now when we configure an alarm to send a trap, it will get sent to this IP address on the specified port.

NetGuardian global trap manager configuration.
The final step in setting up SNMP traps was making the unit send traps on alarms. To do this all we needed to do was enable the checkbox next to the alarms that he wanted to recieve traps on.

Configured base alarm screen.
Although the client had most of his notifications going to the T/Mon, there were a few alarms that he wanted to receive notifications for via email so he could see him on his phone while still in the field. To set this up, we first went to Edit -> System, and filled in the fields "Name" and "Location." An email notification will have these two fields as the from email address like "[Name]@[Location]." Our example below would send the email from "NG832G5&dpstele.com". Some mail servers are picky about how this is formatted.

Configured 'from' email address.
Now that we've configured our from address, we need to configure a notification to send it to an email server. The example screenshot below would send the notification to rridley@dpstele.com on server IP 10.10.10.l0.
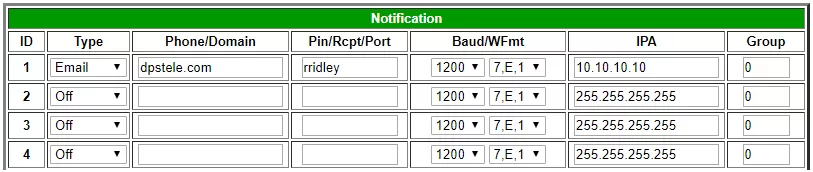
Configured email notification
The final step now is to attach the notification to the alarm point. We do this by putting the number of the notification in the pagers section of the alarm. Here we set alarm point 1's primary pager to 1 (you can also use the secondary pager the same way). This will cause it to send a notification on the change of state of that alarm point.
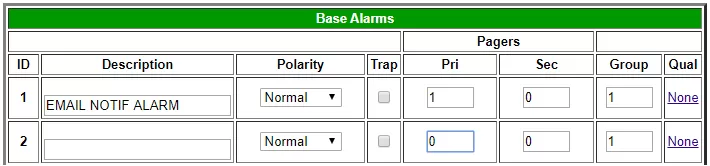
class="imgCap">Attached notification to an alarm point.
There are other notifications that you can set up, such as SMS text notifications (longer descriptions may require MMS). Here's a link to our TKPs where you can find guides on configuring other types of notifications.
If you're still having trouble setting up your NetGuardian, or are unsure about the next steps to get everything working, give us a call! We'll be more than happy to help you get your equipment configured.

Andrew Erickson
Andrew Erickson is an Application Engineer at DPS Telecom, a manufacturer of semi-custom remote alarm monitoring systems based in Fresno, California. Andrew brings more than 19 years of experience building site monitoring solutions, developing intuitive user interfaces and documentation, and opt...